Prong, Bezel, and Halo Settings for Diamond Earrings Compared
Prong, Bezel, and Halo Settings for Diamond Earrings Compared
Introduction
A prong setting holds a gem with claws of metal, a bezel wraps it in a continuous metal rim, and a halo surrounds it with a ring of small stones — three different answers to one question: how do you keep a diamond on an earring without hiding it.
Buyers ask which is "best," and that question is badly formed. A 4-prong head on a 0.10 ct melee and a full bezel on a 1.50 ct stud solve different problems. One maximizes light return per gram of metal. The other maximizes retention and wearer safety. Compare them without first fixing stone size, cut, and wearing context and you get a tidy table that tells you nothing useful.
This tutorial runs the comparison the way a production jeweler runs it: stone first, then retention, then proportions, then comfort and compliance, then cost. Work through the five steps and you can choose a setting for any earring SKU in a catalog and defend that choice to a retail buyer, an OEM client, or a QC inspector. It applies to lab grown diamonds, moissanite, and hydrothermal emerald — though material hardness changes the recommendation more than most buying guides admit.
Key Takeaways
- Fix carat bracket, cut, and material hardness before comparing any setting style.
- Full bezels win on retention; 4-prong wins on light return; halos win on apparent size.
- Prong tips for melee under 0.15 ct should sit around 0.6–0.8 mm thick.
- Earring posts typically run 0.8–1.0 mm; nickel release must meet EN 1811 limits.
- Sample a pair before committing to a production run, not after.
What You Need Before Starting
Gather these inputs first. Skipping any one of them turns the comparison into guesswork.
- A live stone spec sheet — carat brackets, shapes, and certification status. Factories usually stock melee from 0.003 ct to 0.15 ct, then 0.15–0.5 ct, 0.5–0.99 ct, 1–1.99 ct, and 2 ct up, and each bracket behaves differently in a setting.
- The cut list — round brilliants, ovals, pears, cushions, princess cuts, emerald cuts, asschers, marquise, baguette, trapezoid.
- Metal choice — 14K or 18K gold, platinum, or silver, checked against ISO 9202 fineness requirements.
- Target retail price and volume — because labor per stone decides whether a halo is viable.
- Compliance destination — the EU, UK, and US each ask different questions about nickel release and cadmium content.
Before quoting, confirm which size brackets your supplier actually holds in stock rather than what a catalog claims — the Product Categories page is the fastest way to see the real range of shapes and carat weights a factory runs.
Step 1 — Fix the Stone Before You Argue About the Setting
What to Do
- Record the carat bracket. Write "0.5–0.99 ct" or "1–1.99 ct," not "about a carat." Prong counts and halo stone counts scale with it.
- Name the cut precisely. Brilliant cuts hide behind prongs well; step cuts do not.
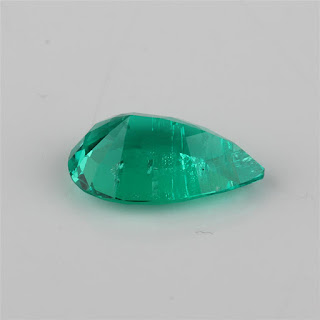
- Log the material hardness. Diamond sits at 10 on the Mohs scale, moissanite at roughly 9.25, hydrothermal emerald at 7.5–8.
Why This Matters
Hardness drives wear. A diamond prong tip can be filed to 0.6 mm and will hold that shape for years. An emerald tip of the same thickness will chip and round over, and a thin bezel wall protects a soft stone far better than four slim claws. Step-cut stones such as the Emerald Cut are a specific case: their flat, open tables and sharp corners show every prong shadow and chip at the corners, which is why bezel and half-bezel designs dominate that category.
Common Mistakes to Avoid
- Comparing settings across different stone sizes. A halo that flatters a 0.75 ct stone overwhelms a 0.20 ct melee.
- Ignoring corner vulnerability. Princess, emerald, and asscher cuts need metal or double prongs at the corners.
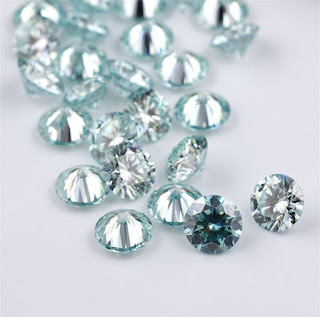
- Assuming all colorless stones behave alike. Moissanite's higher refractive index and double refraction read differently inside a closed bezel than diamond does.
Step 2 — Compare How Each Setting Retains the Stone
What to Do
Build a single comparison table for the SKU and force every option through it.
| Setting | Metal coverage | Typical spec | Retention risk | Best use |
|---|---|---|---|---|
| 3-prong | Very low | 0.6–0.8 mm tips | High — one contact point lost | Small studs, fashion lines |
| 4-prong | Low | 4 points, 0.6–0.8 mm | Moderate | Round studs 0.10–1.00 ct |
| 6-prong | Low-medium | 6 points | Low | Stones above 1.00 ct |
| Half bezel | Medium | 0.4–0.7 mm wall | Low | Drop and dangle earrings |
| Full bezel | High | 0.4–0.7 mm wall | Very low | Daily-wear studs, soft stones |
| Halo | Medium + ring | 16–24 melee per 1 ct center | Moderate (halo stones) | Size-enhancement studs |
| Halo + bezel | High | Bezel center, halo surround | Very low | Premium bridal earrings |
Why This Matters
Retention is a numbers game. A 4-prong head fails when one prong lifts; a 6-prong head needs two failures to drop the stone. A full bezel distributes load around 360° of the girdle and never depends on tip integrity, which is why it dominates hypoallergenic and children's lines. The trade-off is light: a closed bezel blocks light entering the pavilion, and a stone that returns 90% of incident light in a prong head may look noticeably softer in a bezel.
Common Mistakes to Avoid
- Copying a halo count without checking melee availability. A 22-stone halo needs 22 matched melee in one sieve size — confirm stock before promising a design.
- Using a bezel on a shallow-cut stone. It flattens an already weak light return.
- Selling 3-prong as a "minimalist" premium option. It is a cost option. Price it honestly.
Step 3 — Get the Proportions Right
Wall thickness and prong thickness decide whether the piece survives real life. Practical ranges used across the trade:
- Prong tips: 0.6–0.8 mm for melee under 0.15 ct; 0.9–1.2 mm for centers above 1 ct.
- Bezel wall: 0.4–0.7 mm. Below 0.4 mm the rim deforms on impact; above 0.8 mm it starts swallowing the stone.
- Halo outer diameter: roughly 1.2–1.6 mm wider than the center stone's diameter.
- Halo melee: typically 16–24 stones for a 1 ct round center.
Color planning belongs in this step too. A white-metal halo around a Color Diamond intensifies contrast and pushes the body color forward, while a halo in matching 18K yellow or rose gold softens it. Decide which effect you are selling before the CAD is drawn.
Common Mistakes to Avoid
- Scaling a halo in CAD without adjusting melee diameter. Gaps appear at the 12 and 6 o'clock positions.
- Uniform prong thickness. Larger stones need heavier claws or the girdle load concentrates.
- Skipping the girdle check. A knife-edge girdle sitting in a thin bezel channel is a warranty claim waiting to happen.
Step 4 — Account for Comfort, Backing, and Skin Contact
Earrings are worn on the body, so compliance is not optional.
- Post diameter: 0.8 mm (20 gauge) suits most lobes; 1.0 mm (18 gauge) suits heavier stones and stretched piercings.
- Weight per earring: keep drop earrings balanced; a top-heavy halo stud above roughly 4 g per pair starts to droop forward.
- Nickel release: EN 1811 limits nickel release to 0.2 µg/cm²/week for post assemblies that pass through the skin and 0.5 µg/cm²/week for other parts. Specify nickel-free white gold or rhodium-plated parts and get the test report.
- Backing choice: friction butterfly for daily studs, screw-back for high-value stones, La Pousette for a low-profile premium feel.
Common Mistakes to Avoid
- Ignoring plating thickness. Rhodium plating is normally 0.05–0.2 µm; thinner coatings wear through at the post in months and expose the alloy underneath.
- Using the same post gauge across the whole line. It is the single most common comfort complaint.
Step 5 — Cost the Metal and Labor, Then Validate With a Sample
Run the numbers before design lock. A bezel adds metal mass — often 10–25% over a comparable prong setting — plus filing and finishing time. A halo adds stone-setting labor per unit and 16–24 extra stones to source, sort, and match. Against a base 4-prong stud, expect a bezel to sit modestly higher on material and a halo to sit higher again on labor.
Then order physical samples. A CAD render cannot show you prong shadow on a step-cut table or how a halo behaves on an earlobe. Plan for a short sampling cycle — many factories quote 2–4 days for stock items with expedited DHL or FedEx shipping — and test the sample against your own QC list: prong symmetry, bezel gap, halo continuity, post straightness, and backing tension.
Pro Tips for Success
- Keep a printed stone-and-setting matrix at your desk. One page, one row per SKU, no hunting through email threads.
- Order matched melee in a single sieve size for halos. Mixed sieve sizes are the number one cause of visible halo seams.
- Specify double prongs at the corners of princess and emerald cuts. It costs minutes in setting and prevents the most common repair.
- Ask for the EN 1811 report with the first sample, not the fifth order. Compliance retrofits are expensive.
Frequently Asked Questions
Which setting is safest for diamond stud earrings?
A full bezel is the most secure. It grips the girdle around 360°, has no tips to bend or catch, and survives knocks that would lift a prong. For maximum light return, a 6-prong head on stones above 1 ct is the practical compromise between security and brilliance.
Do halos make a diamond look bigger?
Yes, by design. A halo adds roughly 1.2–1.6 mm to the outer diameter and creates a continuous field of sparkle around the center stone, so a 0.75 ct center reads closer to a 1 ct in face-up size. The effect depends on keeping halo melee matched in size and color.
Can you put a moissanite in a bezel setting?
You can, and it works well — moissanite's 9.25 Mohs hardness tolerates daily wear. The caveat is optical: a closed bezel reduces light entering the pavilion, and moissanite's higher refractive index means the difference is more visible than with diamond. A half bezel or an open-back bezel solves it.
Are prong settings bad for soft stones like emerald?
They are risky. Hydrothermal emerald at 7.5–8 Mohs chips at thin prong tips and at sharp corners. Use a bezel or half bezel with a protective rim, or double prongs with a low profile so the table sits closer to the metal.
How thick should a bezel wall be on an earring?
Aim for 0.4–0.7 mm. Under 0.4 mm the rim dents on impact and can crack a soft stone; over 0.8 mm the metal starts covering too much of the crown and the stone loses face-up size.
Conclusion
Comparing prong, bezel, and halo settings only becomes useful once you fix the stone — carat bracket, cut, and hardness — before touching the design. From there the logic is sequential: check retention against how the earring will be worn, set prong and bezel dimensions to proven ranges, verify post gauge and EN 1811 nickel release for skin contact, and only then cost the metal and labor. That order prevents the classic error of designing a beautiful halo around melee you cannot source in a matched sieve size. Start with your three best-selling earring SKUs, build the comparison table for each, order one sample pair per setting, and wear-test them for a week before the production run. The settings you keep will be the ones that survive the test — and your return rate will show it.

评论
发表评论