S925 Engagement Ring Quality Factors: Metal Stamp, Plating, and Prong Security
S925 Engagement Ring Quality Factors: Metal Stamp, Plating, and Prong Security
Introduction
When you order a sterling silver engagement ring from a manufacturer, the invoice says "S925." But what actually arrives in the DHL box can vary wildly depending on who cast it, how they plated it, and whether the prongs were set by hand or by machine. S925 engagement ring quality factors — metal stamp, plating, and prong security — are the three things that separate a ring that lasts decades from one that turns fingers green and drops stones within a year. This article walks through each factor step by step, with the specific numbers and standards you should check before approving a production run. If you are sourcing for a jewelry brand, an e-commerce store, or a custom bridal line, these are the acceptance criteria you need on your spec sheet.
Key Takeaways
- Verify the S925 stamp is deep enough to survive polishing without disappearing.
- Rhodium plating thickness of 0.5–1.0 microns determines tarnish resistance and white brightness.
- Prong security depends on metal thickness, stone depth, and the setting technique used.
- Ask your manufacturer for plating adhesion and porosity test reports before bulk orders.
- A 2–4 day production lead time is achievable when specifications are locked upfront.
What You Need Before Starting
Before you evaluate any sample, gather a few basic tools. A 10x jeweler's loupe is non-negotiable — you cannot check prong tips or stamp depth with the naked eye. A digital caliper with 0.01 mm resolution helps you measure band thickness and prong height. For plating verification, you can start with a simple acid test kit, but for production batches, request an X-ray fluorescence (XRF) report from the factory. XRF measures plating thickness non-destructively and is the industry standard for verifying rhodium or gold layers.
You also need a clear specification sheet. Define the metal alloy (S925 means 92.5% silver, 7.5% copper or other metals), the plating type and minimum thickness, and the stone setting method. If you are sourcing from a manufacturer that produces both Engagement Ring and wedding bands, ask for their standard QC checklist. A reputable factory will share it without hesitation.
Step 1 — Verify the S925 Metal Stamp
What to Do
The S925 stamp is your first quality gate. Check three things: presence, depth, and placement. Use your loupe to inspect the inside of the shank. The stamp should read "S925" or "925" clearly, with no blurring. Depth matters more than most buyers realize — a shallow stamp can be polished away entirely during finishing. Industry practice for sterling silver is a stamp depth of at least 0.1 mm to survive standard polishing cycles.
- Inspect the stamp under 10x magnification.
- Measure stamp depth with a calibrated probe or compare against a known reference sample.
- Confirm the stamp location is consistent — usually inside the shank, opposite the center stone.
Why This Matters
The stamp is your legal and commercial proof of alloy content. In the US, the Federal Trade Commission (FTC) requires that quality marks like "925" be accurate; a ring stamped S925 that tests below 92.5% silver is misbranded. For B2B buyers, the stamp also signals the factory's quality culture. Factories that stamp deeply and consistently tend to control other variables — casting porosity, plating, stone setting — with the same discipline.
Common Mistakes to Avoid
- Assuming the stamp guarantees purity: The stamp is a claim, not a test result. Always request a mill certificate or independent assay for bulk orders.
- Ignoring stamp depth: If the stamp is faint, it will disappear after the first re-polish, and you lose traceability.
- Accepting "925" without the "S": Some factories stamp only "925." That is acceptable, but "S925" is more explicit and preferred for international markets.
Step 2 — Check the Plating Quality
What to Do
Sterling silver tarnishes. That is a fact of metallurgy — silver reacts with sulfur compounds in the air, forming a dark film. To keep engagement rings bright, manufacturers apply rhodium plating. The key metric is thickness, measured in microns. A functional rhodium layer is 0.5–1.0 microns. Below 0.5 microns, the plating wears through quickly on high-contact areas like the shank underside. Above 1.0 microns, you risk cracking because rhodium is brittle.
- Request the plating thickness spec from your supplier — it should be in microns, not "heavy" or "extra."
- Ask for an XRF test report on the finished ring, not just the raw material.
- Check plating adhesion by bending a sample wire or ring shank — the plating should not flake or peel.
Why This Matters
Plating is the difference between a ring that looks white-bright for years and one that turns yellow or tarnishes within months. For a Wedding Ring worn daily, plating wear is inevitable. The question is whether the base layer is thick enough to give 12–24 months of acceptable appearance before re-plating is needed. Rhodium plating also affects hypoallergenic properties — a complete, pinhole-free layer prevents nickel or copper exposure from the base alloy.
Common Mistakes to Avoid
- Trusting visual inspection alone: Rhodium and silver look similar under a loupe. Only XRF or destructive testing confirms thickness.
- Skipping adhesion tests: Plating that looks perfect can delaminate after a few weeks of wear if the surface prep was poor.
- Not specifying plating on the PO: If you do not write "rhodium plated, 0.5–1.0 microns" on the purchase order, you have no recourse when the factory ships unplated silver.
Step 3 — Evaluate Prong Security
What to Do
Prong security is the most critical factor for stone retention. A loose prong means a lost diamond — and a lost customer. Evaluate three variables: prong thickness, prong height, and the seat depth where the stone rests. For a 1-carat round stone (approximately 6.5 mm diameter), prongs should be at least 1.0–1.2 mm thick at the tip. The prong height should cover at least 40–50% of the stone's crown height. The seat — the ledge where the girdle rests — must be cut deep enough that the stone sits below the prong tips, not on top of them.
- Measure prong thickness at the tip and at the base with your caliper.
- Check that all prongs are even — no high or low prongs.
- Gently push the stone with a wooden dowel or your thumb; it should not move or rock.
Why This Matters
A well-set stone distributes impact forces across the prongs. If one prong is thinner or shorter, it takes disproportionate stress and will eventually bend or break. For pave settings and side-stone rings, the same logic applies at a smaller scale — melee stones (0.003–0.15 carats) need bead settings that are uniform and secure. The setting technique matters as much as the metal. Hand-set prongs by an experienced setter are generally more secure than machine-set ones, but consistency is harder to achieve.
Common Mistakes to Avoid
- Judging security by visual appeal only: A ring can look beautiful and still have a stone that rattles.
- Ignoring the girdle: If the stone's girdle is too thin or chipped, the prongs have nothing to grip.
- Skipping the "push test": Always physically test stone movement before approving a sample.
Step 4 — Assess the Setting Style for Your Stone Type
What to Do
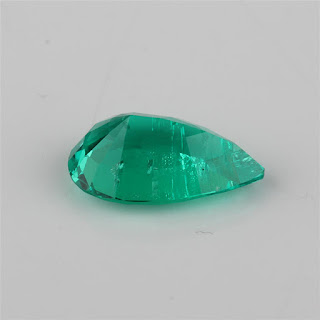
Different stone shapes and sizes require different setting approaches. A round brilliant in a four-prong solitaire has different security requirements than a pear-shaped stone in a six-prong setting. Pear and marquise stones have pointed ends that are vulnerable to chipping — those points need V-shaped prongs or a bezel for protection. For Classic Wedding Rings with channel-set stones, the channel walls must be high enough to hold the stones without flexing.
- Match the setting style to the stone shape — pointed stones need protective prong designs.
- For pave settings, check that bead sizes are uniform (typically 0.8–1.0 mm).
- Verify that the gallery (the metal under the stone) is solid, not hollow or porous from casting.
Why This Matters
The setting style is not just aesthetic — it is an engineering decision. A tension setting, for example, holds the stone by compression and requires a specific metal thickness and hardness. If the factory casts the ring too thin, the tension will fail. Similarly, a halo setting with 20–30 melee stones has dozens of potential failure points; each bead must be inspected. Understanding how setting style interacts with stone shape helps you specify the right design for durability.
Common Mistakes to Avoid
- Choosing a setting style for looks alone: Some designs are inherently less secure. A six-prong solitaire is more secure than a four-prong for the same stone.
- Not specifying minimum metal thickness: For a solitaire, the shank should be at least 1.5 mm thick at the bottom to prevent bending.
- Forgetting about resizing: If the ring will be resized, the setting must accommodate that. Channel-set stones on the shank complicate resizing.
Step 5 — Review the Manufacturer's Quality Control Process
What to Do
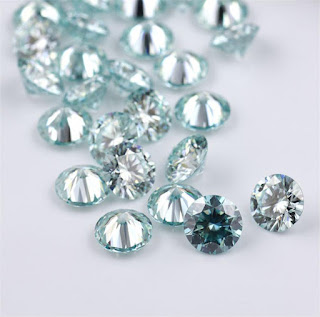
Before placing a bulk order, ask the factory about their QC workflow. A serious manufacturer will have multiple inspection points: after casting, after setting, after polishing, and after plating. Ask for their defect rate and what constitutes a reject. For a factory producing lab-grown diamond and moissanite rings, the QC process should include stone verification (checking that the stone matches the invoice), setting security checks, and plating thickness verification.
- Request a sample batch of 5–10 rings for destructive testing — bend, push, and wear-test them.
- Ask about their return and rework policy for defective pieces.
- Confirm the production lead time — many manufacturers quote 2–4 days for standard orders, with expedited shipping via DHL or FedEx.
Why This Matters
Your reputation depends on the factory's QC. If they ship a batch with 5% loose stones, you absorb the returns, the negative reviews, and the customer service cost. A factory with documented QC processes and transparent defect rates is worth more than one that promises perfection but cannot show you their inspection records.
Common Mistakes to Avoid
- Skipping the sample order: Never go straight to bulk. A 5-piece sample run reveals more than a hundred pages of specs.
- Not testing the finished product: Wear-test a sample for a week. Shower with it, sleep with it, bump it against doors.
- Ignoring the plating report: If the factory cannot provide XRF data, assume the plating is thin.
Pro Tips for Success
- Specify plating thickness in microns on every PO — "rhodium plated, 0.5–1.0 microns" is unambiguous; "heavy rhodium" is not.
- Ask for a video of the stone-setting process — you can see whether the setter is using proper tools and technique.
- Request a porosity check on cast rings — X-ray inspection can reveal internal voids that weaken prongs.
- Build a relationship with one factory — consistent QC improves when you are a repeat customer who checks details.
- Keep a reference sample — your approved sample is the benchmark for every future batch.
Frequently Asked Questions
What does the S925 stamp actually mean?
S925 means the metal is 92.5% pure silver, with the remaining 7.5% typically being copper or other alloys for strength. Pure silver (99.9%) is too soft for jewelry that must hold stones. The stamp is a claim of alloy content, so always verify with testing for bulk orders.
How thick should rhodium plating be on an S925 ring?
A functional rhodium layer is 0.5–1.0 microns. Below 0.5 microns, the plating wears through quickly on high-contact areas. Above 1.0 microns, the rhodium layer can become brittle and crack. Ask your supplier for an XRF test report to verify thickness.
How can I test if a prong is secure?
Use a 10x loupe to check that all prongs are even and cover at least 40–50% of the stone's crown. Gently push the stone with a wooden dowel — it should not move or rock. For a 1-carat stone, prongs should be at least 1.0–1.2 mm thick at the tip.
Conclusion
S925 engagement ring quality factors — metal stamp, plating, and prong security — are the three pillars of a ring that performs. The stamp proves the alloy, the plating protects the surface, and the prongs protect the stone. None of these can be verified by eye alone; you need tools, test reports, and a factory that welcomes scrutiny. Start with a small sample order, test it destructively, and document every specification in writing. A manufacturer that quotes 2–4 days production and ships via DHL or FedEx can move fast — but only you can ensure they move in the right direction. Lock your specs, verify your samples, and build a quality standard that survives contact with the real world.

评论
发表评论